Development
Introducing Xniffer, the Swift network profiler built on top of URLSession!
Do you often want to debug or monitor external service responses in you app, recognize latency and work with the data you receive back? Same happens to us! That’s why we created Xniffer , a non intrusive framework to intercept outgoing requests and their responses. Developed in Swift for iOS platforms, inspired by Response detective.
Why use Xniffer?
Xniffer not only returns the responses' result, it also has a UI component that shows them to you in real time, feature which other libraries don't have. It displays the latency of HTTP messages, and you can set up your own delegate to do whatever you want with the returned data. Wanna start to use it right away? Just setup some configurations, choose how you want to see the requests and that's it!
How to use it?
To start working with Xniffer, it needs to be added as a middleware between your URLSession and the Internet. After the initial setup, a window will be displayed on top of the UI that will show all the current requests and their latency.
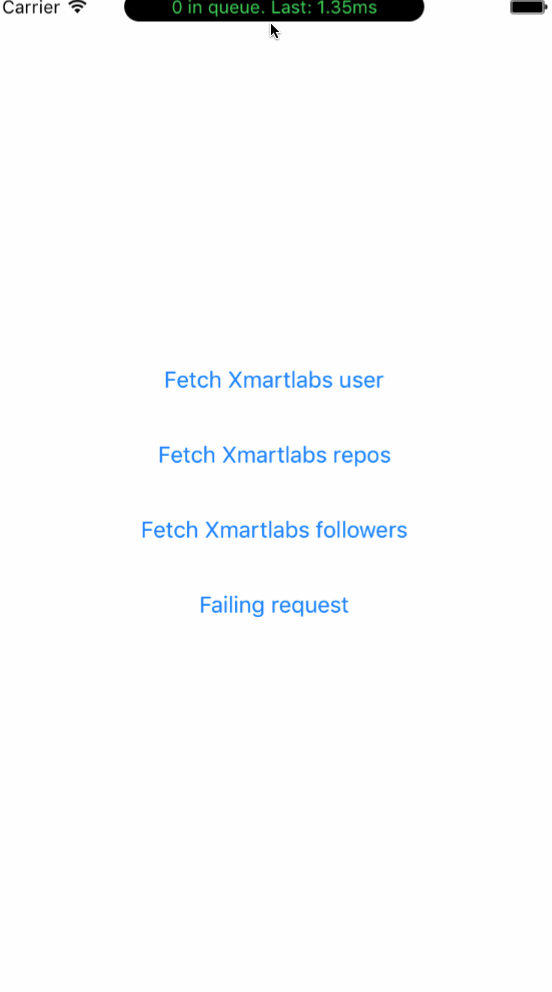
Basic usage
let configuration = URLSessionConfiguration.default
// The setup method adds the Xniffer's custom protocol as a middleware.
Xniffer.setup(with: configuration)
let session = URLSession(configuration: configuration)
Now we can start using this session instance for our requests!
Using Alamofire
If you're using Alamofire you can start using the Xniffer by initializing your Manager with the following:
let configuration = URLSessionConfiguration.default
configuration.httpAdditionalHeaders = SessionManager.defaultHTTPHeaders
Xniffer.setup(with: configuration)
let sessionManager = SessionManager(configuration: configuration)
let manager = NetworkManager(manager: sessionManager )
Now you're ready to go! You can also change the way you see the responses (by default you will see them displayed in a window on top of the status bar).
UI Modes
The Xniffer currently supports three modes, .window, .console and .custom. The default value is .window but this can be changed easily on the setup: Xniffer.setup(with configuration: URLSessionConfiguration, mode: XnifferUI = .window). Each one uses a different implementation of the XnifferDelegate.
.window: Displays a window on top of the status bar which can be expanded to display a list of the profiled requests. This is the default value..console: Prints the results on the Xcode console..custom: This one receives a closure of type() -> ()so you can use your own implementation of theXnifferDelegate.
To see these three different ways of displaying the results we invite you to visit our Github project.
Installation
CocoaPods
CocoaPods is a dependency manager for Cocoa projects.
To install Xniffer, simply add the following line to your Podfile:
pod 'Xniffer', '~> 1.0'Carthage
Carthage is a simple, decentralized dependency manager for Cocoa.
To install Xniffer, simply add the following line to your Cartfile:
github "xmartlabs/Xniffer" ~> 1.0Where to go from here
We hope this works as a good introduction to this open source library. On GitHub you'll find everything you need to get started. If you want to collaborate, feel free to contribute with this library.